


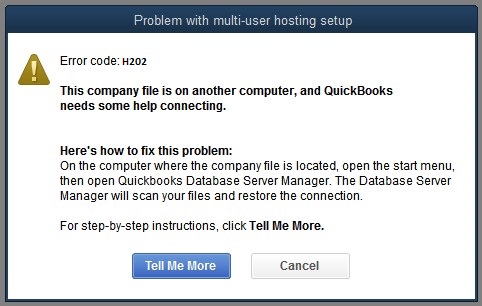
One of the most frequent and annoying problems users encounter when attempting to switch to multi-user mode is QuickBooks Error H202. This error means that the company file on the server computer cannot be accessed by QuickBooks Desktop. This disrupts workflow and delays daily accounting tasks by preventing users on workstations from accessing the shared file.
This error is typically caused by a communication breakdown between the workstations attempting to access the company file and the server hosting it. The good news? If you follow the correct steps, you can quickly fix this error. The causes, signs, and tried-and-true fixes for QuickBooks Error H202 are covered in this guide, which will also help you restore system functionality.
What Causes QuickBooks Error H202?
To effectively resolve the issue, recognizing its triggers is essential:
1. Incorrect Hosting Configuration
For multi-user mode, QuickBooks must be properly configured. The connection fails and Error H202 is triggered if hosting is enabled on workstations rather than the server.
2. Firewall or Security Program Blocking Communication
Incoming and outgoing communication that is necessary for multi-user mode may be blocked by your firewall. QuickBooks raises the H202 error when it is unable to access necessary ports.
3. QuickBooks Database Server Manager Issues
Workstations cannot access the company file if the QuickBooks Database Server Manager is not installed on the server.
4. Damaged or Incorrect DNS Settings
Workstation computers may not be able to find the server hosting the QuickBooks company file due to DNS problems.
5. Server Services Not Running
It’s possible that vital services like QuickBooksDBXX or QBCFMonitorService are disabled or not working.
6. Network Problems
QuickBooks Error H202 may also result from improper network paths, weak or erratic network connectivity, or improperly configured router settings.
How to Fix QuickBooks Error H202 (Proven Solutions)
One by one, use these techniques to fix the error.
1. Verify Hosting Settings on All Computers
Hosting should only be enabled on the server.
At every workstation:
Launch QuickBooks Desktop.
- Navigate to File > Utilities.
- Click Stop Hosting Multi-User Access if it appears.
- Do not click on Host Multi-User Access if it appears.
On the server:
- Navigate to File > Utilities.
- If available, choose Host Multi-User Access.
Simple hosting disputes are frequently resolved in this way.
2. Add QuickBooks Ports to Your Firewall
For effective multi-user communication, QuickBooks requires certain ports to be open.
Common QuickBooks ports include:
- 8019
- 56728
- 55378–55382
Steps:
- Navigate to the Windows Firewall settings.
- For every port, add inbound and outbound rules.
- Try again after restarting QuickBooks.
3. Use QuickBooks Database Server Manager
This tool ensures your server is properly configured.
Steps:
- Launch the QuickBooks Tool Hub.
- Choose Network Problems.
- Select the QuickBooks Database Server Manager option.
- Examine the folder where your company file is located.
- Restart QuickBooks on every system.
This will fix the problem if the server manager wasn’t operating or wasn’t configured correctly.
4. Test Network Connectivity
To confirm that the workstation and server are connected, use the ping command.
- Type CMD and hit Enter after pressing Windows + R.
- Type:
Ping [server-name]
- A network problem is confirmed if the results fail or time out.
If necessary, reset router settings, update DNS, or fix the network connection.
5. Restart QuickBooks Services on the Server
Two crucial services need to be operational:
- QuickBooksDBXX
- QBCFMonitorService
To get started:
- Type services.msc and hit Enter after pressing Windows + R.
- Locate every service, then right-click and choose Restart.
- In the Startup Type column, select Automatic for both services.
This aids in reestablishing communication between workstations and the server.
6. Create a New .ND File
QuickBooks uses Network Data (.ND) files to locate the server.
Step:
- Navigate to the QuickBooks company file folder.
- Find the file that ends in.ND.
- Remove it.
- Rescan the folder after launching QuickBooks Database Server Manager.
Corrupted network path problems can be fixed with a new.ND file.
7. Switch QuickBooks to Multi-User Mode Again
After all settings have been adjusted:
- On the workstation, launch QuickBooks.
- Navigate to File > Select Multi-User Mode.
The error should no longer occur if everything is configured correctly.
Preventive Tips to Avoid QuickBooks Error H202 in the Future
- Update QuickBooks Desktop.
- Don’t use a workstation to host the company file.
- Maintain constant, reliable network connectivity.
- Update the QuickBooks firewall and antivirus exceptions.
- After adding new company files, launch QuickBooks Database Server Manager.
- Make regular backups of your data to guard against corruption
By taking these precautions, the likelihood of coming into contact with H202 is greatly decreased.
Your workflow may be disrupted by QuickBooks Error Code H202, particularly in multi-user settings where collaboration and real-time updates are crucial. Thankfully, you can remove this error and regain seamless access to your company file by following the correct troubleshooting procedures, which include adjusting hosting settings, updating firewall configurations, using Database Server Manager to scan, and confirming network connectivity.
Contact our certified support team at +1-866-500-0076 for prompt assistance if you require professional assistance to resolve QuickBooks Error H202 in a safe and timely manner.
