


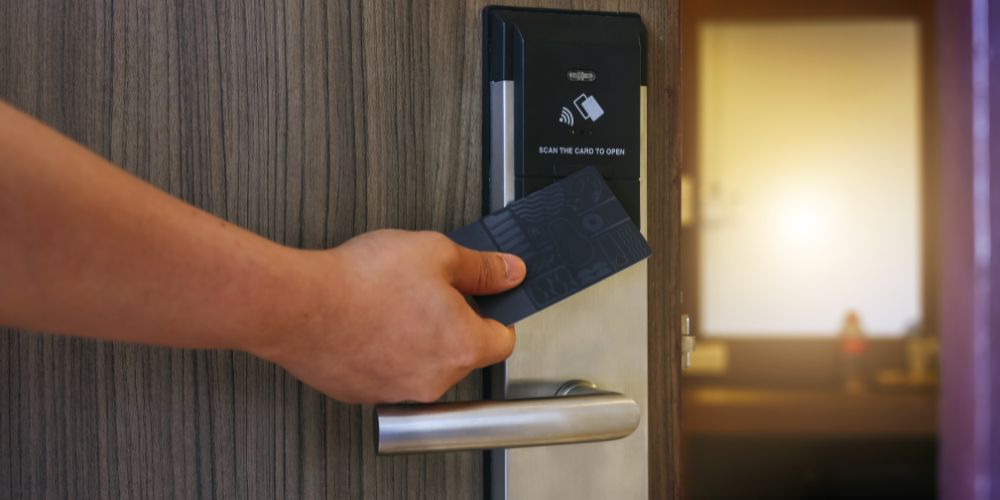
Home security has changed a lot in recent years, and one of the best upgrades you can make today is installing a smart lock. Unlike traditional locks that depend only on keys, smart locks allow you to control entry with your phone, a keypad, or even voice commands. This makes daily life easier while also giving you better control over your home’s safety.
What makes smart locks stand out is their mix of convenience and security. You don’t have to worry about forgetting or losing your keys anymore. With a simple tap on your phone or by entering a code, you can unlock your door in seconds. Some models even let you check who comes and goes, which is very useful for families, shared homes, or anyone who wants extra peace of mind.
For beginners, the idea of setting up a smart lock might seem a little overwhelming. With so many features and different models on the market, it’s natural to feel unsure. But once you understand the steps, the process becomes straightforward. This guide will walk you through everything you need to know so you can install your smart lock with confidence.
What Smart Locks Are and Why They’re Useful
Smart locks are electronic locks that connect to your smartphone or smart home system using Bluetooth, Wi-Fi, or other wireless technology. Instead of carrying keys, you can unlock your door with a code, a fingerprint, or your phone.
They offer several advantages. You can lock or unlock your door from anywhere, which is handy if you forget your keys or need to let someone in when you’re not home. You can also set up codes for family members or guests and check activity logs to see who came and went.
For everyday use, the biggest benefit is convenience. No more digging through your bag for keys, no more worrying about losing them—just quick and easy access whenever you need it.
Getting Ready for Smart Lock Installation
Before starting the Smart Locks Installation, you’ll need to prepare a few things. First, choose a smart lock that fits your needs. Some models come with keypads, while others use fingerprints or apps. Make sure the lock works with your door and is compatible with your home’s setup.
Check the thickness and type of your door because not all locks fit every door. Also, decide if you want a battery-powered lock or one that connects to your home’s wiring.
Gather basic tools like a screwdriver, a tape measure, and maybe a drill. Reading the manual before you begin is also important since different locks may have slightly different instructions.
Taking Out the Old Lock
The first real step is removing your old lock. Use a screwdriver to unscrew the faceplate and then slide out the interior and exterior parts of the lock. Don’t rush this process, as you don’t want to damage the door or frame.
Once the lock is out, check the opening in your door. It should be clean and smooth so the new smart lock fits securely.
Installing the New Smart Lock
Now you’re ready to put in the new hardware. Start with the latch—the part that goes on the edge of the door. Make sure it lines up with the strike plate on the frame and screw it in tightly.
Next, place the outside unit of the smart lock on the door. This is usually the keypad or touchpad. Feed the connecting cable through the hole so it can reach the inside unit.
Attach the inside unit, which usually holds the batteries and main controls. Connect the cable from the outside part, fasten everything with screws, and insert the batteries. Once the cover is back on, the physical installation is done.
Setting Up the Digital Features
The next part of the Smart Locks Installation is setting up the digital functions. Download the manufacturer’s app on your smartphone and follow the steps to connect the lock via Bluetooth or Wi-Fi.
You’ll be asked to create a master code or register a fingerprint. This is the main access method, and you can later add codes for family members or guests. Some locks also allow voice control through Alexa, Google Assistant, or Apple HomeKit.
Explore the app to learn about features like automatic locking, entry logs, and remote access. These settings make the smart lock more useful and secure.
Testing the Lock
Once everything is set up, test the lock to make sure it works. Try locking and unlocking it with the keypad, app, or fingerprint. Check that the latch fits smoothly into the strike plate.
Also test the extra features, such as temporary codes or notifications. This step helps you spot small issues early and fix them before relying on the lock every day.
Common Problems and Fixes
Beginners sometimes run into small problems. If the lock doesn’t line up properly with the strike plate, adjust the position until it works smoothly.
If the lock doesn’t power on, check the batteries and make sure they are the right type. Connectivity problems can often be fixed by restarting the lock and your Wi-Fi router.
Most manufacturers include troubleshooting guides, so keep the manual handy if something doesn’t work right away.
Looking After Your Smart Lock
Taking care of your smart lock will help it last longer. Replace batteries when the app warns you, clean the keypad or sensor regularly, and avoid using harsh cleaning products.
It’s also important to keep the software updated. Updates often add new features and fix security issues, so check for them from time to time.
Why a Smart Lock is Worth It
A smart lock makes life easier while also improving your home’s security. You can grant access to others without handing out spare keys, and you can control your door even when you’re not at home.
For families, busy professionals, or anyone who values convenience, a smart lock is a great investment.
Conclusion
Installing a smart lock may seem like a big task, but once you follow the steps carefully, it’s something even beginners can do. From removing the old lock to setting up the new one and testing it, each part of the process helps you build confidence while making your home safer.
If you’d prefer professional help, you can always count on trusted locksmith services like B&B Locksmith to handle the installation smoothly and ensure everything is set up the right way.
